Basic usage for project version control
Should you be working with large blocks of code and multiple project files, you may want to use Git to track your changes. Git allows you to take snapshots of entire directories, checkout previous versions of your project and revert back to them if necessary. Although plugins and GUIs exist, we will be using Git in the
PowerShell command line. Let this guide serve as a light introduction on the basic commands to efficiently track your project and code.
Installation
Download Git from Powershell with Winget Should Winget be unavailable, download it directly from https://git-scm.com/downloadswinget install -e --id Git.Git
✂
Import the Git for PowerShell module
Set-ExecutionPolicy RemoteSigned -Scope CurrentUser -Confirm
✂
PowerShellGet\Install-Module posh-git -Scope CurrentUser -Force
✂
Configuration
Set username and email *mandatory
git config --global user.name "Massi"
✂
git config --global user.email "admin@massi.net"
✂
Set the default code editor to VS Code
git config --global core.editor "code --wait"
✂
Set EoL to auto
git config --global core.autocrlf true
✂
View the config file
git config --global -e
✂
See all options
git config --help
✂
New project
Navigate to the working directory, it will be your repository
cd "C:\path\to\project"
✂
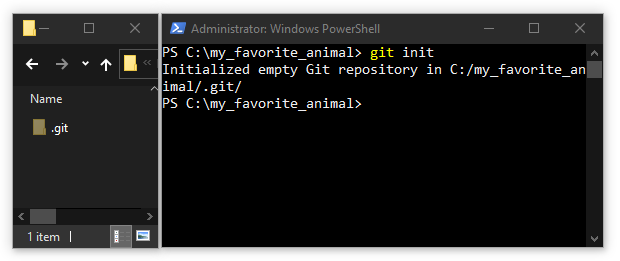
Initiate the repository
git init
✂
*Don't ever touch this folder!
Removing the .git folder deletes the projects history data. Even if temporarily removed and placed back it's original working folder, you will lose the project history tracked by git.
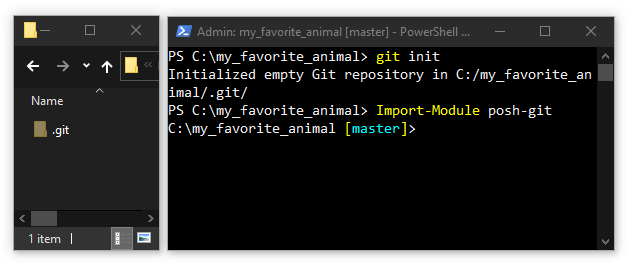
Get Git's console in PowerShell
Import-Module posh-git
✂
Workflow
Develop your project
Show what files were added or modified in the repository
git status
✂

Stage all files in the repository
git add .
✂
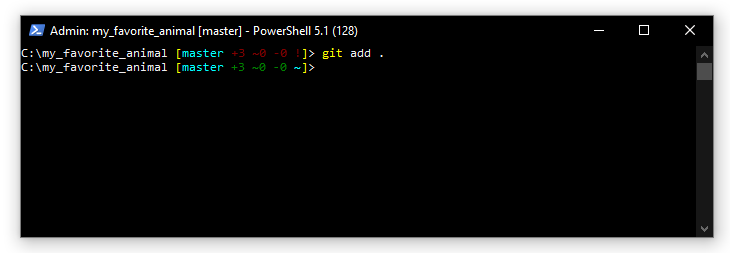
Staging files with git add is mandatory to commit changes
Should you only want to stage specific files, specify the file/directory with git add "file.txt"
Commit the changes and give your commit a title or description (I.E: "version_1" or "completed the introduction")
git commit -m "version_1"
✂
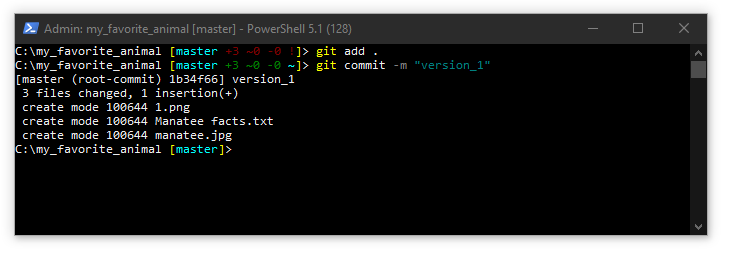
Creating a commit is to create a snapshot of your project.
Repeat these steps as you continue working on your project.
Create more commits.
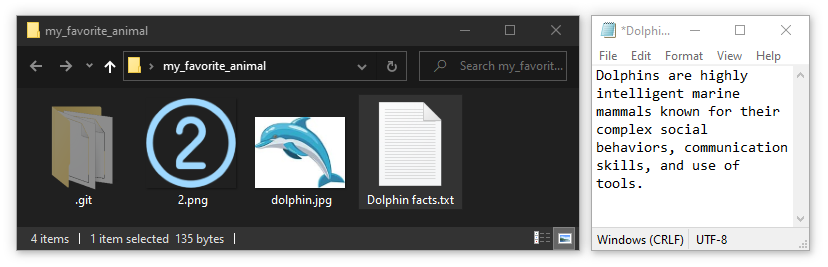
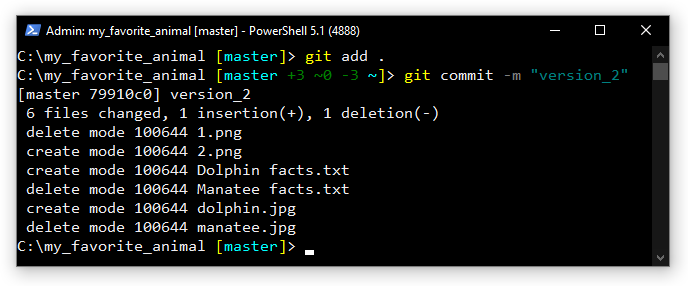
You decided that dolphins are your new favorite animal
Stage
git add .
✂
git commit -m "version_2"
✂
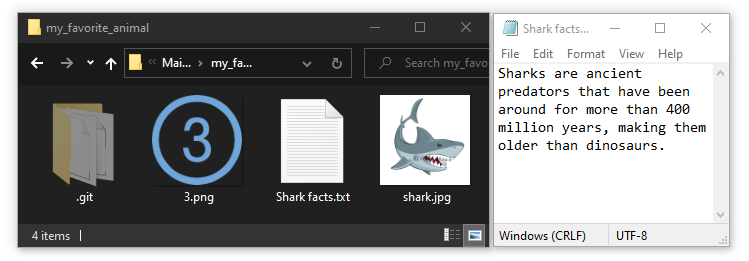
Actually you like sharks more
Stage
git add .
✂
git commit -m "version_3"
✂

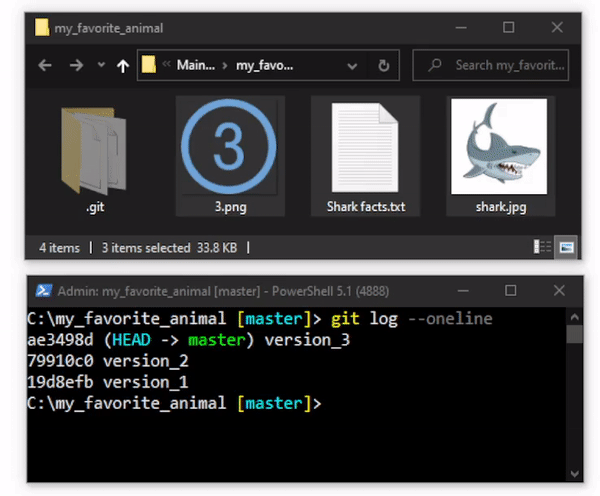
See the commit log and commit IDs
git log --oneline
✂
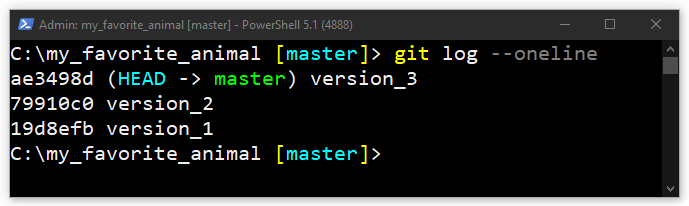
The log shows the commit history. version_3 is now the master, the latest version of the project
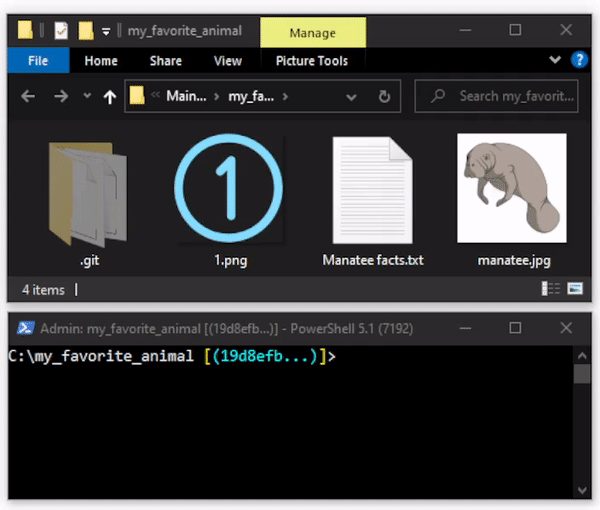
Viewing old commits
You want to temporarily view version_1 of your project
Checkout the commit ID associated with version_1
Your commit ID will differ.
git log --oneline
✂
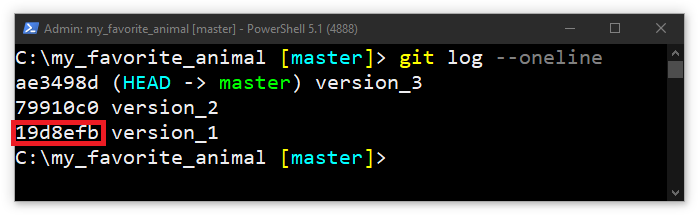
git checkout 19d8efb
✂
You are now viewing version_1 of your repository
You are done reviewing the old version.
Go back to the master branch, the current state of your project
git checkout master
✂
You are now back at the head of the master, the latest version of your project
Creating branches
You discover manatees may soon be relisted as endagered. You want to continue researching manatees without affecting the current master.
Let's create a branch from the manatee commit called manatee
Checkout the manatee commit (version_1)
git checkout 19d8efb
✂
git branch manatee
✂
git switch manatee
✂

Changes in a branch only affect the current branch
Commits in the branch will not affect nor be listed in the master
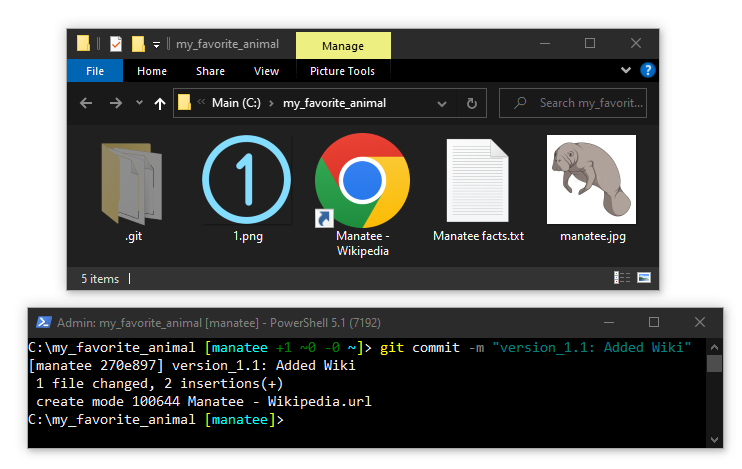
You added information to the manatee branch
Add, commit
git add .
✂
git commit -m "version_1.1: Added Wiki"
✂
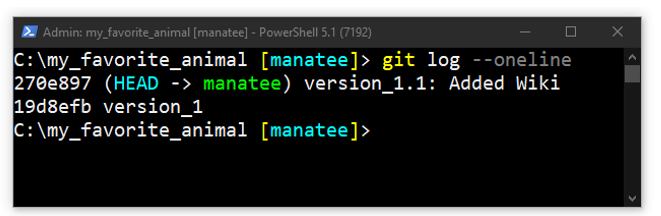
View the commit log in current branch
git log --oneline
✂
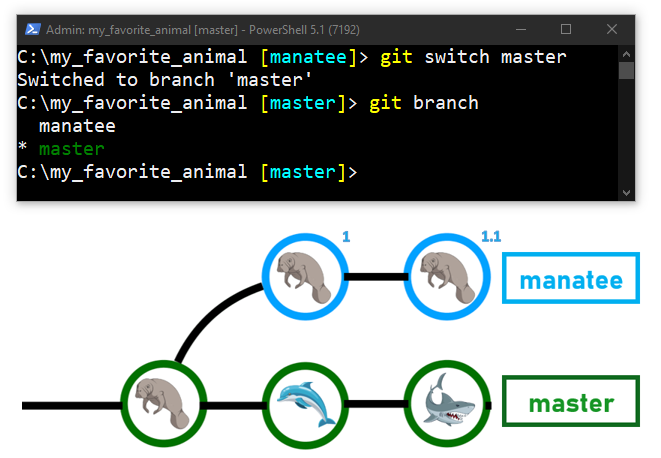
Your research on manatees is complete
Go back to the master branch
git switch master
✂
View branches in your project
git branch
✂
Your niece has a new found interest in dolphins. Let's create a branch for version_2 called dolphin
Checkout the dolphin commit (version_2)
git checkout 79910c0
✂
git branch dolphin
✂
git switch dolphin
✂
You added information to the dolphin branch
Add, commit
git add .
✂
git commit -m "version_2.1: Added Wiki"
✂
git log --oneline
✂
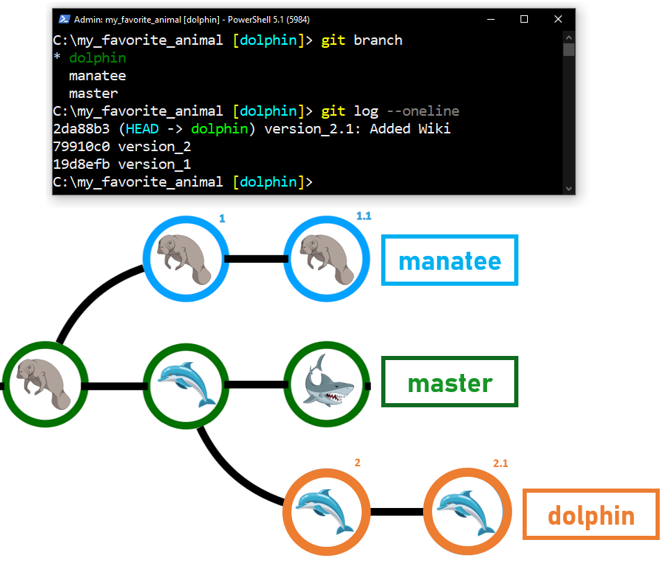
Your research on dolpins is complete
Let's continue expanding on sharks and add one more commit to the master
Switch to the master branch
git switch master
✂
Add, commit
git add .
✂
git commit -m "version_3.1: Added Wiki"
✂
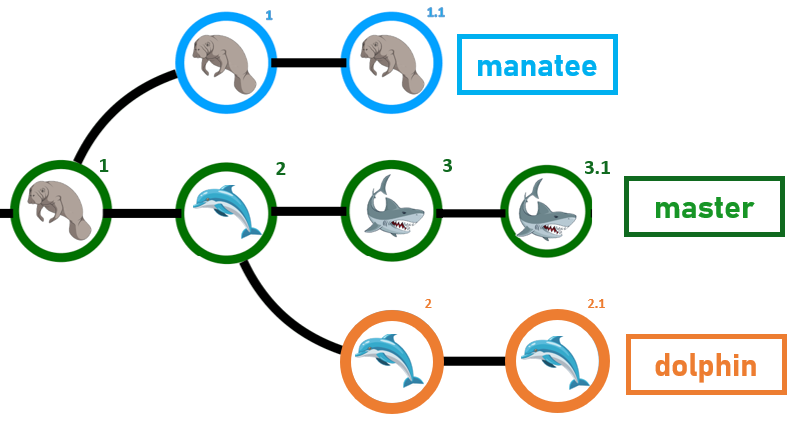
Merging branches
The master only contains your research on sharks. At first, you only wanted your project to be on sharks. Now, you want your research on manatees and dolphins to be included in your final project.
Let's merge the manatee and dolphin branches to the master so that your final project contains all your previous research on other branches.
Switch to the manatee branch
git switch manatee
✂
Merge the current branch to the master with git merge master
git merge master
✂
git switch manatee
✂
Changes in a branch only affect the current branch
Commits in the branch will not affect nor be listed in the master
You added information to the manatee branch
Add, commit
git add .
✂
git commit -m "version_1.1: Added Wiki"
✂
View the commit log in current branch
git log --oneline
✂